See also: Using
the .Net AJAX Update Panel – C#
This article will show how to use the .Net AJAX Update Panel
control to provide feedback and prevent timeout of long running processes. This
article will simulate a long running process and show how we can give feedback
to the user during the processing. This
project was written using Visual Studio 2008 using VB.Net.
What is the AJAX Update Panel Control?
AJAX (Asynchronous JavaScript and XML) is
a short acronym for a long name but a very simple concept. AJAX is simply a way
of updating a portion of a web page without refreshing the entire page. Anyone
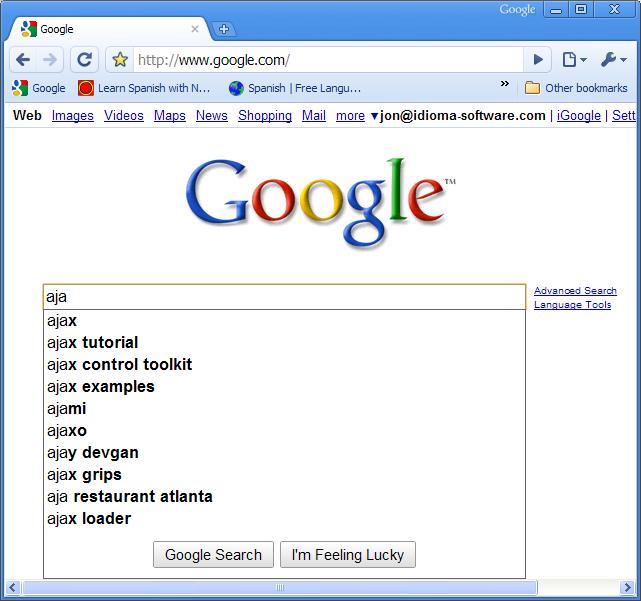
who has used google lately has used an AJAX application called google suggest, which provides a
dropdown of suggestions as you enter a search string. (See Figure 1).

Figure 1 – Google
Suggest in action.
If you compare pressing the Refresh button with the time it
takes for google suggest to react to your key strokes, you will see the great
advantage in performance over reloading the entire page.
The .Net Update Panel provides a very simple control that
lets us take advantage of this basic concept without the need to use javascript
or jQuery.
Creating the Web Application
To get started with this project, start Visual Studio and
create a new Web Site from the menu. You will want to initially lay out the
page to look something like Figure 2.
short acronym for a long name but a very simple concept. AJAX is simply a way
of updating a portion of a web page without refreshing the entire page. Anyone
who has used google lately has used an AJAX application called
google suggest, which provides a
dropdown of suggestions as you enter a search string. (See Figure 1).

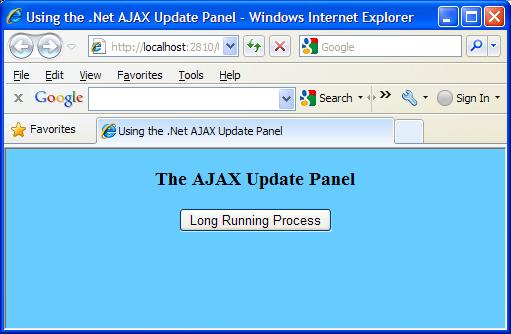
Figure 2 – AJAX Update
Panel screenshot
I have also added a label at the bottom of the form with an
id of “lblStatus” that will display the status as the long running process does
its work. I have named the button and attached two events – one that will run
on the client side to initially set the label text, and a server side method
that will simulate the long running process. The HTML snippet for the button
looks like this:
<asp:Button ID="btnLongProcess" runat="server"
Text="Long Running Process"
onclick="btnLongProcess_Click"
onclientclick="btnLongProcess_onclientclick()"/>
The javascript function is declared in the <head> tag
and should look something like this:
<script type="text/javascript" language="javascript">
function
btnLongProcess_onclientclick() {
document.getElementById("lblStatus").innerText = "Processing...";
return
(true);
}
</script>
You can now double-click the button to bring up the code
window and write the method that will simulate the long running process, which
looks like the following:
Private Const STATUS_COMPLETE = "Process
Complete:"
Private Shared _status As String
Protected Sub btnLongProcess_Click(ByVal
sender As Object,
_
ByVal e As
System.EventArgs) _
Handles btnLongProcess.Click
Dim i As Integer
'Simulate a
long running process
For i =
1 To 100
_status = "Processing
item: " + i.ToString()
System.Threading.Thread.Sleep(1000)
Next
_status = STATUS_COMPLETE
End Sub
Be sure to declare the _status string outside the method and
declared as static. We will be using this string to send status back to the
AJAX UpdatePanel control.
AJAX Extension Controls
Now let’s look at adding the AJAX Extension controls. These
are found in the AJAX Extensions section of the Toolbox. To use any of these
controls, you will need to place a ScriptManager control on the form. For this
application, we will also add an UpdatePanel, and Timer control. Within the
UpdatePanel control we need a ContentTemplate tag. The Timer and Label controls
are placed inside the ContentTempate tags as shown below:
<asp:UpdatePanel ID="UpdatePanel1" runat="server"
UpdateMode="Conditional">
<ContentTemplate>
<asp:Label ID="lblStatus" runat="server" Text=""></asp:Label>
<asp:Timer ID="Timer1" runat="server" Interval="5000"
ontick="Timer1_Tick" />
</ContentTemplate>
</asp:UpdatePanel>
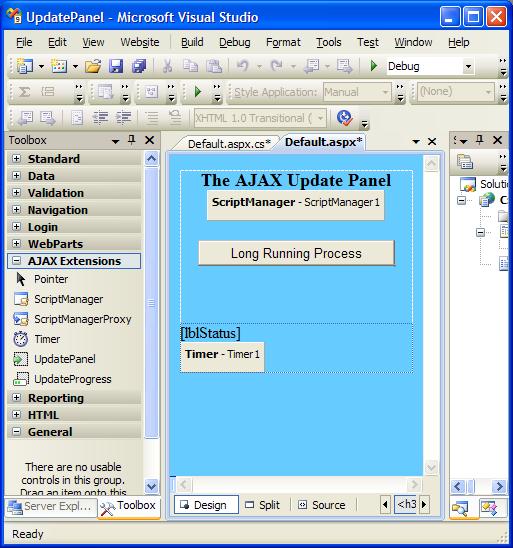
Figure 3 shows a
screenshot of the AJAX Extensions tools and the form:

Figure 3 – AJAX Extensions
Now let’s add the last method – Timer_Tick. Double-click the
Timer control to bring up the code window and add the following method:
Protected Sub Timer1_Tick(ByVal
sender As Object,
_
ByVal e As
System.EventArgs) _
Handles Timer1.Tick
lblStatus.Text = _status
End Sub
This method will wake up every 5 seconds = 5000 milliseconds
as defined in the Interval attribute in the Timer tag. When it does, it will
set the Label, (which must lie within the UpdatePanel tag) to the current
status as updated by the long running process.
Check it out
Now when you run the application, pressing the Long Running
Process button should cause the Label to initially display “Processing…”
followed by ½ second or so updates of the current line number being processed.
If you have any problems, you can download the code from the link above.